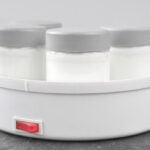
Making yogurt at home doesn’t require any specialized equipment. You can buy a yogurt maker, but you may already own several other types of incubators, such as a thermos. As an alternative, you may use a covered container placed in a regular oven (ideally with the light on), a microwave, a cooler (filled with hot water jars to help keep the interior warm), or a slow cooker (preheat the slow cooker but turn it off to incubate). Another choice is to simply wrap the covered container in a blanket, towel, or heating pad.
A half gallon of milk and roughly a half cup of yogurt are all you need to make homemade yogurt. The thickest, creamiest yogurt will be made using whole or 2% milk, but you can also use skim milk if you like. Greek or ordinary yogurt is acceptable for the yogurt, but flavorings should be avoided; opt instead for plain, unflavored yogurts.
Once you master this fundamental technique for making yogurt, you may make all kinds of adjustments and modifications. Some individuals like to thicken their yogurt by adding gelatin or dry milk powder, while others prefer to filter the liquid whey out to create a dense Greek-style yogurt. You can get subtly varying flavors and nutritional advantages by culturing the milk with various brands of commercial yogurt.
Purchasing a unique starter from a health food shop, food co-op, or online is another option. Cultures for Health is my go-to site for interesting introductions.
A simple approach for making homemade yogurt – no need for heirloom yogurt cultures or expensive incubators.
This is a simple method for making homemade yogurt that only needs two ingredients that I learned from someone. Take note of the notes. If this is the first time, cut the recipe in half. Usually, homemade yogurts don’t work out correctly because store-bought yogurts have so many chemicals. However, save 1 cup and use it as the base the following time to see how it turns out.
Cook’s notes
• Yogurt should be allowed to sit for at least five hours, but it can safely sit for much longer periods of time, even overnight. It’s okay to leave the yogurt maker alone for a few more hours if you’ve set the timer for a shorter incubation period (like five hours). The same holds true for incubation in a thermos or using an other method; just bear in mind that the final yogurt will be thicker and tastier the longer the incubation period.
• The whey that drains from the yogurt is rich in vitamins and minerals and can be used to make simple drinks, added to smoothies and lassis, or used as a cooking liquid.
• You can also mix in 3 or 4 tablespoons of nonfat powdered dry milk before adding the starter to thicken yogurt.
• You can multiply or triple this recipe; just make sure to adjust the starter and milk amounts accordingly.
• To prevent the milk from boiling over in Step 1, you can leave a wooden spoon in the pot.
• I typically store yogurt in the refrigerator for one to two days before using it, although this is not necessary.
• Use caution because the yogurt will start to become sour after 7 to 10 days because it is handmade. By then, use it up, but save a cup for later! The yogurt base you use the next time can be sour. It won’t harm the yogurt.
Making yogurt at home doesn't require any specialized equipment. A simple approach for making homemade yogurt.
The milk should be poured into a pot and heated to a boil while being stirred occasionally to avoid sticking. Simmer for about 10 minutes on low heat; do not allow it to boil over.
Pot should be taken from the heat and left to stand for 30 to 60 minutes. Every so often, dip your finger into the milk to test the temperature to see when it can stay there for 10 to 15 seconds without burning. Yogurt should be poured in; stirring is not necessary.
After covering the pot with a lid, carefully encircle it with a blanket. The wrapped pot should be left undisturbed for 6 to 10 hours, preferably overnight, in a moderately warm location. Put the yogurt in the fridge to let it continue to thicken.
16 servings
- Amount per serving
- Calories131
- % Daily Value *
- Total Fat 5g7%
- Saturated Fat 3g15%
- Cholesterol 20mg7%
- Sodium 110mg5%
- Total Carbohydrate 12g5%
- Total Sugars 12g
- Protein 9g
- Vitamin C 3mg4%
- Calcium 311mg24%
- Iron 0mg0%
- Potassium 400mg9%
* The % Daily Value (DV) tells you how much a nutrient in a serving of food contributes to a daily diet. 2,000 calories a day is used for general nutrition advice.







Leave a Review